What this page is
Short, task-shaped walkthroughs for the things authors actually do in the app. Each recipe is under a minute to skim: land on the surface, follow the steps, get out. If a recipe references a broader concept (the Wizard, Provenance, voice fingerprint), the linked page has the full context — the recipe is deliberately just the sequence.
The recipes are ordered roughly by likelihood — starting a book and importing a draft at the top, more advanced flows toward the bottom. Skim the whole page once to know what's here; come back when you actually need a specific one.
I have an idea. How do I start a book?
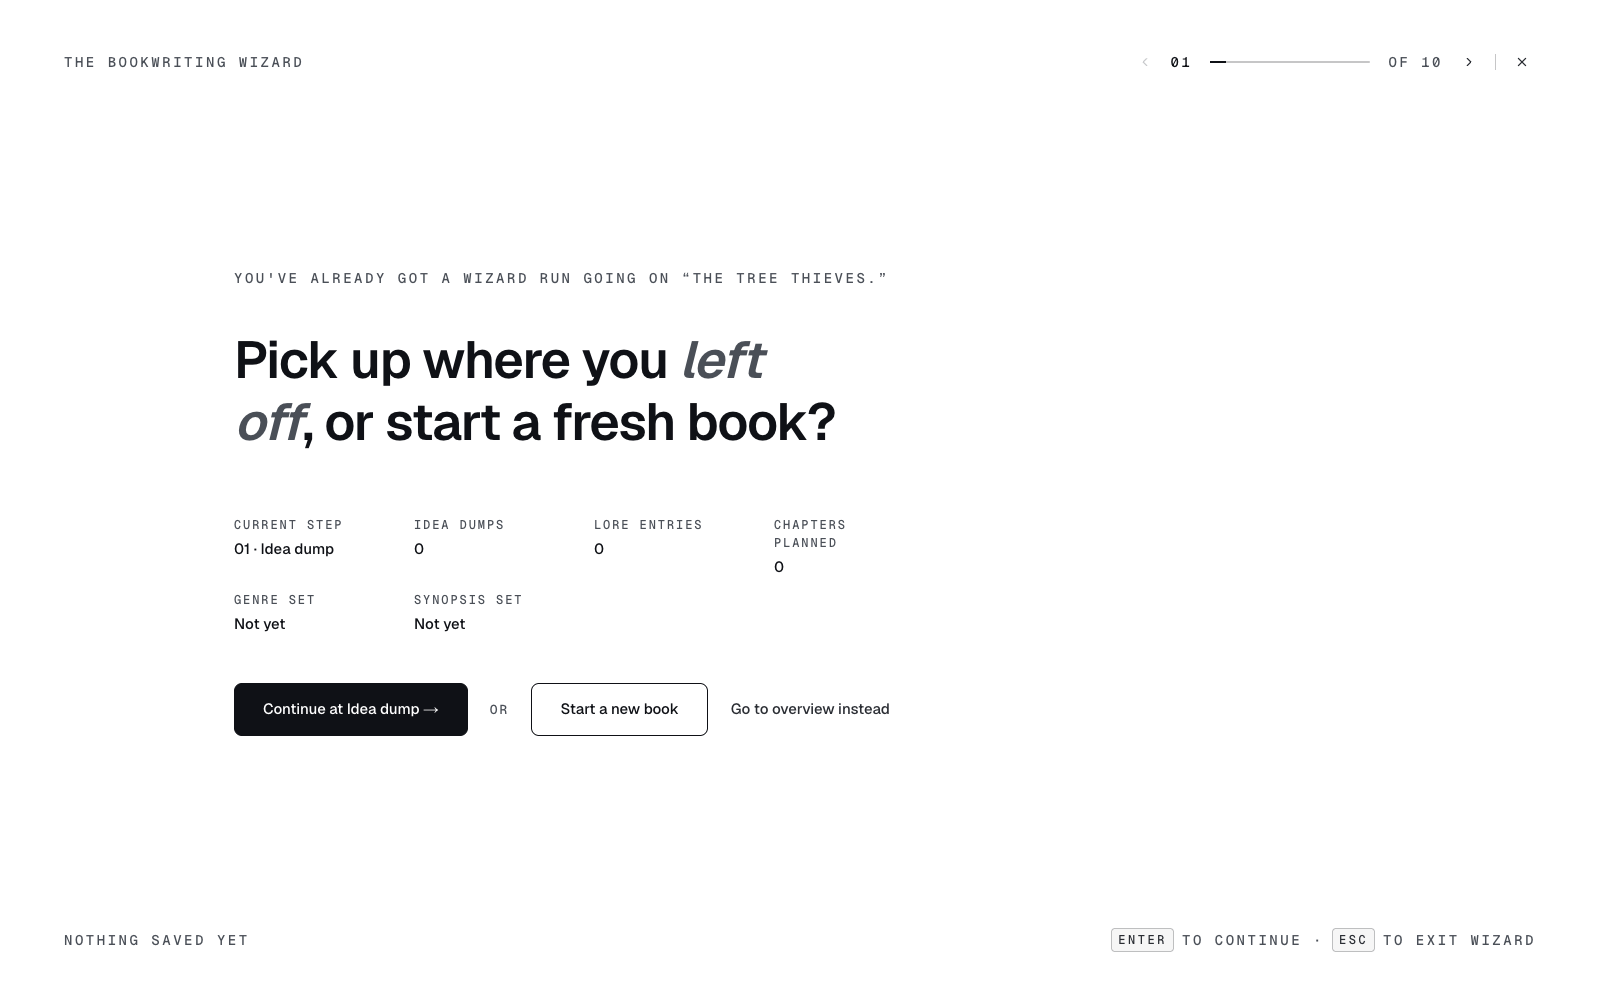
The fastest path from "vague idea" to "structured manuscript with chapters and characters populated" is the Wizard — a 10-step interview that seeds every downstream surface (Outline, Lore Book, Write) with the answers you give in the first hour. Budget an hour and don't rush Q4 (the synopsis) or Q3 (the style line) — those two answers compound into every later step, so a bit of care up front saves a lot of rework later.
- Open Sign up and create an account with a handle and password. You land on the Dashboard.
- Click New manuscript in the top-right of the dashboard. A dialog asks for a working title — type one and confirm.
- On the new manuscript card, click Open the Wizard. The 10-step interview loads in a full-page view.
- Answer each of the 10 questions in The Wizard. Budget about an hour and don't rush Q4 (the synopsis) — the later steps build on it.
- After Q9 the Wizard generates a document and lands you back on the dashboard. A new entry appears in the doc list with your working title.
- Click Write in the sidebar and open the seeded document. The chapter/scene skeleton is already in place — put your cursor in a paragraph and start writing.
- Once the manuscript passes ~5,000 words, open Voice fingerprint and click Generate so future AI suggestions in Write, Templates, Desk, and Echoes match your prose.
I already have a draft. How do I import it?
If you already have a manuscript in .docx, .md, .txt, or .pdf, you can bring it in intact rather than starting from scratch. The importer preserves heading structure (H1 becomes chapter, H2 becomes scene) and assigns a stable ULID to every paragraph — which is what lets Provenance track future AI edits at paragraph granularity from that moment forward. Docx and Markdown import cleanest because their heading levels are unambiguous; PDF and plain text come in flat and need heading adjustment in the editor.
- Open the Dashboard and click Upload book in the top-right. A file picker opens.
- Choose your manuscript file —
.docx,.md,.txt, or.pdfare supported..docxand.mdimport cleanest because they preserve headings. - Wait for the upload spinner to finish. The importer detects chapters from H1 headings and scenes from H2, and assigns a stable ID to every paragraph. Expect 5–30 seconds for a novel-length draft.
- When import completes, the manuscript appears as a new entry in the dashboard doc list. Click it to open in Write.
- Scroll through the document and confirm the chapter breaks. If a chapter split is wrong, change the heading level in the editor — H1 makes it a chapter, H2 a scene.
- If your draft has an existing world bible or notes, open Vault and drag them in. Vault files become searchable from Ask and available to whole-book Chat.
How do I export my book to send to an editor?
Exporting is one click from the editor's meta row. The DOCX format is what most editors expect (Word is still the industry standard for line edits); PDF is for readers who want a printed or reflowable copy; EPUB and AZW3 are for e-readers; Markdown and plain text are for archival or feeding to another tool. If your editor or agent has asked about AI usage, export the Provenance ledger too — it's the audit trail that lets them see exactly what the AI contributed.
- Click Write in the sidebar and open the document you want to send.
- Find the meta row above the editor. On the right side, hover the Export button. A dropdown of formats appears.
- Click DOCX — that's the format most editors want. The other options are PDF, EPUB, AZW3 (Kindle, needs Calibre), Markdown, and Plain text.
- The download opens in a new tab and saves to your default downloads folder. Attach the file to your email.
- If your editor also wants the AI-usage record, open Provenance from the sidebar.
- In the Provenance header, click Export and choose Markdown. Attach that file alongside the DOCX.
How do I run the AI on a single paragraph?
The most common AI interaction in the app is the inline command — select some text, pick an operation, review the suggestion in a side sheet, accept or reject. Every accept is logged to Provenance with the exact before/after; every reject vanishes without a trace. The BubbleMenu that hosts these commands appears above any selection in the editor and offers 12 inline operations plus three "Transform" submenus (Humanize, Translate to, Paraphrase as).
- Click Write in the sidebar and open the document you want to edit.
- Click and drag to select the paragraph — or any span of text.
- The BubbleMenu appears above the selection with formatting buttons and an AI dropdown on the right.
- Click AI to open the command menu. Pick one of the 12 commands under Inline AI (Rewrite, Expand Content, Content Improver, and so on) or one of the three Transform submenus (Humanize, Translate to…, Paraphrase as…).
- A suggestion sheet slides in below the selection and streams tokens in real time. A blinking caret marks the current write position; the header shows "+ N from lore" if any @-mentioned Lore entries were injected.
- Wait for the "Streaming…" indicator to disappear. Accept and Reject buttons then light up at the bottom of the sheet.
- Click Accept to replace your selection with the suggestion, or Reject to discard it. Only Accept enters the manuscript — and every accept is logged to Provenance.
I'm about to write in a character's voice. How do I get their lore in the AI's head?
When you @-mention a Lore Book entry inside a paragraph and then run an AI command on that paragraph, the entry's full fields (traits, wounds, aliases, distinguishing details) are automatically injected into the model's system prompt before it generates. This is Codex auto-injection, and it's the mechanism that keeps the AI writing in character rather than reaching for stock detail. The suggestion sheet header shows "+ N from lore" so you can see how many entries were injected on that specific run.
- Click Write in the sidebar and put your cursor in the paragraph you want to work in.
- Type
@followed by the character's name — or an alias you've registered on that Lore entry. A typeahead list appears with matching entries. - Click the character in the list (or press Enter). A mention chip with the character's name is inserted at your cursor. If no entry matches, click Create on the fly to make one from the same typeahead.
- Select the paragraph you want the AI to rewrite. The BubbleMenu appears above the selection.
- Click the AI dropdown and pick a command like Rewrite or Voice Update.
- The suggestion sheet opens. Look at the sheet header: a "+ N from lore" chip shows how many Lore entries the AI was given as context before it started writing.
- Read the suggestion, then click Accept or Reject. The character's traits, aliases, and canonical facts are now baked into the generated prose.
I've written 30,000 words. How do I generate my voice fingerprint?
The voice fingerprint is a structured JSON style profile — sentence rhythm, vocabulary tics, distinctive habits, an "avoid" list — built by a heavy model reading up to ~8,000 words of your existing prose. Once generated and toggled on, the profile injects into four surfaces (Write's inline commands, Templates, Desk, Atomize/Echoes) so their output sounds like you rather than like generic AI. The Pad, Chat, and Flags deliberately don't inject — Pad is for exploration, Chat is for thinking, Flags is observational.
- Click Voice in the sidebar to open the Voice fingerprint page.
- Click the Generate button in the status card at the top. A spinner appears while the AI reads up to ~8,000 words from your manuscript and Vault sources.
- Wait 20–60 seconds. When it finishes, the profile renders in sections: summary, sentence rhythm, vocabulary, distinctive habits, avoid list, and examples.
- Read the profile top-to-bottom and check it against your ear. If the summary or "distinctive habits" feel off, add more prior published prose to Vault as
manuscript-kind and click Regenerate. - Confirm the on/off toggle in the status card reads On. That's the injection switch — off means the profile exists but isn't fed to any AI surface.
- From here on, every AI suggestion in Write, Templates, Desk, and Echoes is written in your voice. The Pad, Flags, and Chat surfaces deliberately do not inject voice.
I finished a draft. What order should I run the diagnostics in?
The three diagnostic surfaces — Flags, Narrative Flow, Deep Analysis — are designed to be run in an order that gets you the most information for the least cost. Flags first (cheap, structural, catches concrete mistakes). Narrative Flow second (medium cost, shows the shape of the book). Deep Analysis last (expensive, reader-simulation, only worth running when the draft is query-ready). Running Deep Analysis on a raw first draft is like commissioning market research on a napkin sketch — technically possible, rarely useful.
- Click Flags in the sidebar and run it first. It's cheap and structural — catches contradictions, missed setups, and over-repeated images. See Flags. Expect 30–90 seconds on a novel.
- Read every flag it surfaces. Click into each one to jump to the paragraph, then decide: fix now, defer, or dismiss.
- Click Narrative Flow in the sidebar and run it second — medium cost, shows the pacing shape across chapters. See Narrative Flow.
- Revise based on the pacing arc. Common fixes: split a sagging middle chapter, tighten a slow opener, or add a beat to a chapter that reads flat.
- When your draft is close to query-letter-ready, open Reception in the sidebar to run Deep Analysis.
- Confirm the price ($55, one credit) in the confirmation dialog before you start. Only run this once you're confident the structural passes are done — it's the most expensive report in the app.
I want to query agents. What do I draft first?
The Desk surface exists specifically for query-adjacent artifacts: query letter, synopsis, blurb, newsletter. Each is a document-kind with its own input fields and output shape. The typical order for a query submission is: query letter first (it's what the agent reads first), then a two-page synopsis (many agents ask for one alongside), then a back-cover blurb (useful for your website even if the agent doesn't ask). If your voice fingerprint is on, each draft comes back in your voice rather than in generic-query-boilerplate voice.
- Click Desk in the sidebar to open the Desk page.
- Choose Query letter from the document-kind picker at the top.
- Fill in the input fields — comp titles, word count, genre, your one-line bio. The more specific you are, the better the draft.
- Click Draft. The letter streams into the preview pane. If your voice profile is generated and left On, it's injected automatically.
- Read the draft. If it's not right, tweak the inputs and click Draft again. Desk stores every version, so you can scroll back through v1, v2, v3 in the version list on the left.
- When the query letter is close, switch the document-kind to Synopsis and repeat. Do the same for Blurb if you want back-cover copy.
- Open Provenance, click Export, and choose Markdown. Attach that ledger to your query if the agent asks about AI usage.
My book is launching. What promotional copy should I generate?
Atomize (labelled Echoes in the sidebar) takes one source — a document from your manuscript, a Vault file, or pasted text — and generates one first draft per selected promotional channel in parallel. Newsletter, LinkedIn post, Twitter thread, podcast cold open, Instagram caption, back-cover blurb, YouTube description, and ad hooks. Every channel injects your voice fingerprint if it's on, so the copy comes back sounding like you rather than like the same LinkedIn-hustle voice everyone else's launch uses. The output is a first draft — the last 20% of polish is you.
- Click Echoes in the sidebar to open Atomize / Echoes.
- In the source picker, choose one of: a document from your manuscript, a file from your Vault, or pasted text. Pick the opening chapter, a strong scene, or your synopsis.
- In the channel checkboxes below, tick the channels you actually post to. Newsletter, LinkedIn post, Twitter thread, and Instagram caption is a reasonable starting set.
- Confirm the count in the button label. Click Make N echoes. Every ticked channel runs in parallel through OpenRouter.
- Wait 20–60 seconds. Result cards stack in the output pane as each channel finishes. Each card is labelled with its channel name.
- Click the Copy button on each card to grab the text. Edit before you post — the voice profile gets you 80% of the way; the last 20% is you.
- If a channel misses, tweak the source and click Make N echoes again. Runs are logged so you can compare drafts.
Sync is behind. What do I do?
Sync mirrors your local database to the cloud roughly every 30 seconds. If it falls behind — the footer chip stays on "local only" for longer than that, or a queued count like "↑ 3" persists — the fix is almost always a page refresh followed by 60 seconds of patience. Your work is safe on the local database while sync catches up; nothing is lost during the wait. Read Troubleshooting for the full diagnostic pass if the fast recipe below doesn't work.
- Check your network — sync needs a connection. Open any other site in a new tab to confirm you're online.
- Look at the shell footer at the bottom of the app. The sync chip shows a queued count ("↑ 3") or a "synced" timestamp. If it's stuck on a queued number, keep going.
- Refresh the page. Sync restarts on load and re-attempts the drain.
- Wait 60 seconds after the refresh — the sync loop runs every ~30 seconds and needs one or two cycles to catch up.
- If the queued count drops to zero and the chip shows a fresh timestamp, you're good.
- If it's still stuck after 5 minutes and you're online, email support with your account handle and a timestamp. Your work is safe — the local SQLite database has everything.
See Troubleshooting for the full walkthrough.
I want to know how much of my book is AI-written
Provenance is the trust ledger — every AI-accepted change in your manuscript is logged with before-text, after-text, task kind, paragraph IDs, and timestamp. The hero card at the top of the page summarises the whole ledger as a single "N% human-typed" percentage; below it, each document has its own percentage so you can see which chapter leaned on AI. The event log at the bottom is the chronological record you'd export to send an agent or publisher.
- Click Provenance in the sidebar to open the Provenance page.
- Look at the hero card at the top. It shows N% human-typed for the whole manuscript — the single number that summarizes the entire ledger.
- Scroll to the per-document breakdown below the hero. Each of your documents lists its own human-typed percentage, so you can see which chapter or scene leaned on AI.
- Below that, scan the chronological event log. Each entry shows a task kind, the before text, and the after text side-by-side. Click any entry to expand the full diff.
- To share the ledger, use the Export buttons at the top of the page. Choose JSON for machine-verifiable audit or Markdown for a human-readable file to send an agent or publisher.
I want to try a different opening chapter without losing the current one
The Outline is the right place to fork a chapter. Add an alternative scene under the same chapter, link it to a new document, draft the alt in that document, and keep the original scene untouched. When you decide which you're keeping, delete the losing scene from Outline — the other stays intact, and the document behind it stays in your Write list. This is the cleanest way to experiment without touching the main draft.
- Click Outline in the sidebar. The tree of Acts / Chapters / Scenes loads on the left.
- Find Chapter 1 (or wherever your opening lives). Hover the chapter row and click the + action that appears to add a child scene.
- Give the new scene a working title like "Alt opening" in the node editor on the right, and set its status to drafting.
- In the scene's node editor, use the document picker to link it to a new document. That creates a fresh doc dedicated to the alt.
- Click Open on the scene. You jump into Write on the new empty document — write the alternative opening here.
- When you've decided which opening you're keeping, come back to Outline and delete the scene you're discarding. The other stays intact.
I want a place to think without touching my manuscript
The Brainstorm Pad is a separate room — warm amber paper, its own URL, structural rules that prevent anything typed there from crossing into your manuscript. Copy-out is disabled on the AI's response; the system prompt refuses to draft manuscript prose; there is no "send to editor" button. Use it when you want to talk to an AI without any risk of the language leaking into your book. When you're done thinking, walk back to Write and your book is exactly as you left it.
- Look for the Across the hall band in the sidebar — a warm amber strip that separates the manuscript surfaces from the thinking surfaces.
- Click Pad under that band. The Brainstorm Pad opens in its own room with warm amber paper — visibly different from the cool stone paper of your manuscript.
- Type into the pad. Ask the AI to argue with you, freewrite a scene idea, or test a character voice.
- Click Sketch to send your prompt. The AI replies inside the pad — never in the manuscript.
- Try to copy-select the AI's response. You'll notice it resists: copy-out is deliberately disabled on the pad's output, so nothing here can silently cross into your prose.
- When you're done thinking, click Walk back to the manuscript at the top of the pad to return to Write. Your book is exactly as you left it.
What to read next
- Quickstart — if you skipped it, this is the guided first-hour walkthrough
- Keyboard shortcuts — for faster hands
- Glossary — for the words we use and what they mean